This FAQ guide covers the most common topics and questions related to the App creation/submission on the Liferay Marketplace
Who can submit an app on Liferay Marketplace
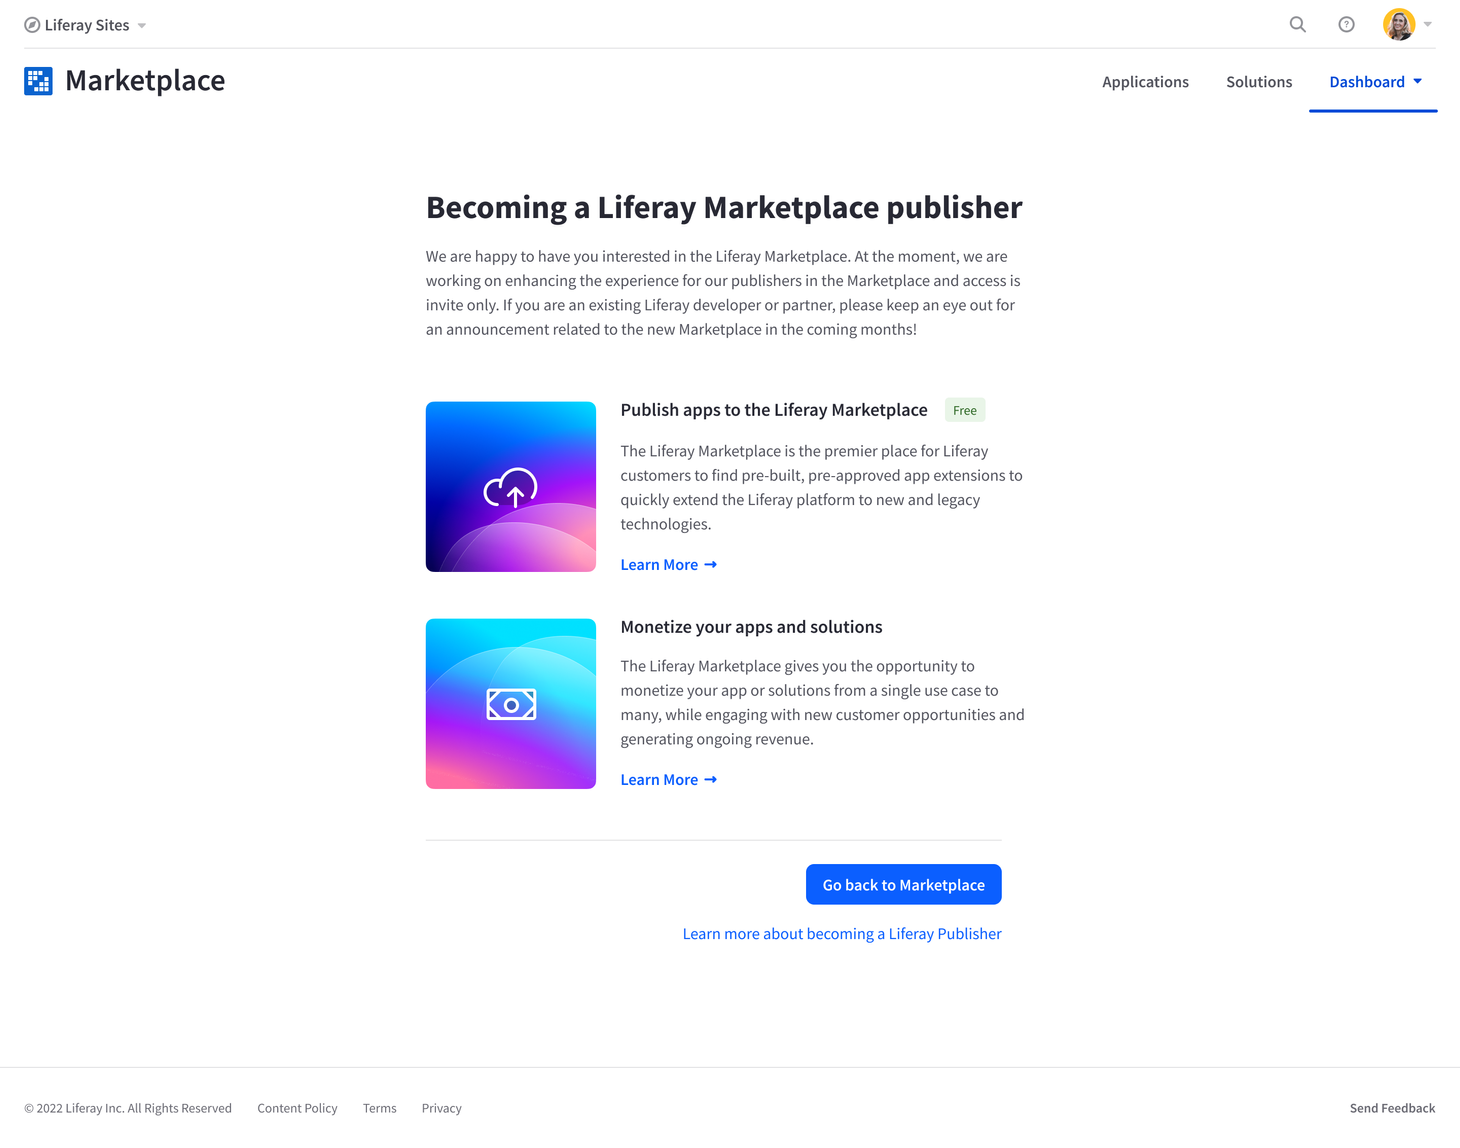
Becoming a Liferay Marketplace publisher
The Liferay user already logged in, can become a Liferay Marketplace publisher simply clicking on the link present in the Dashboard (top of the right corner) and filling the request form.
How can a publisher submit a Cloud Paid and Perpetual App on the Marketplace
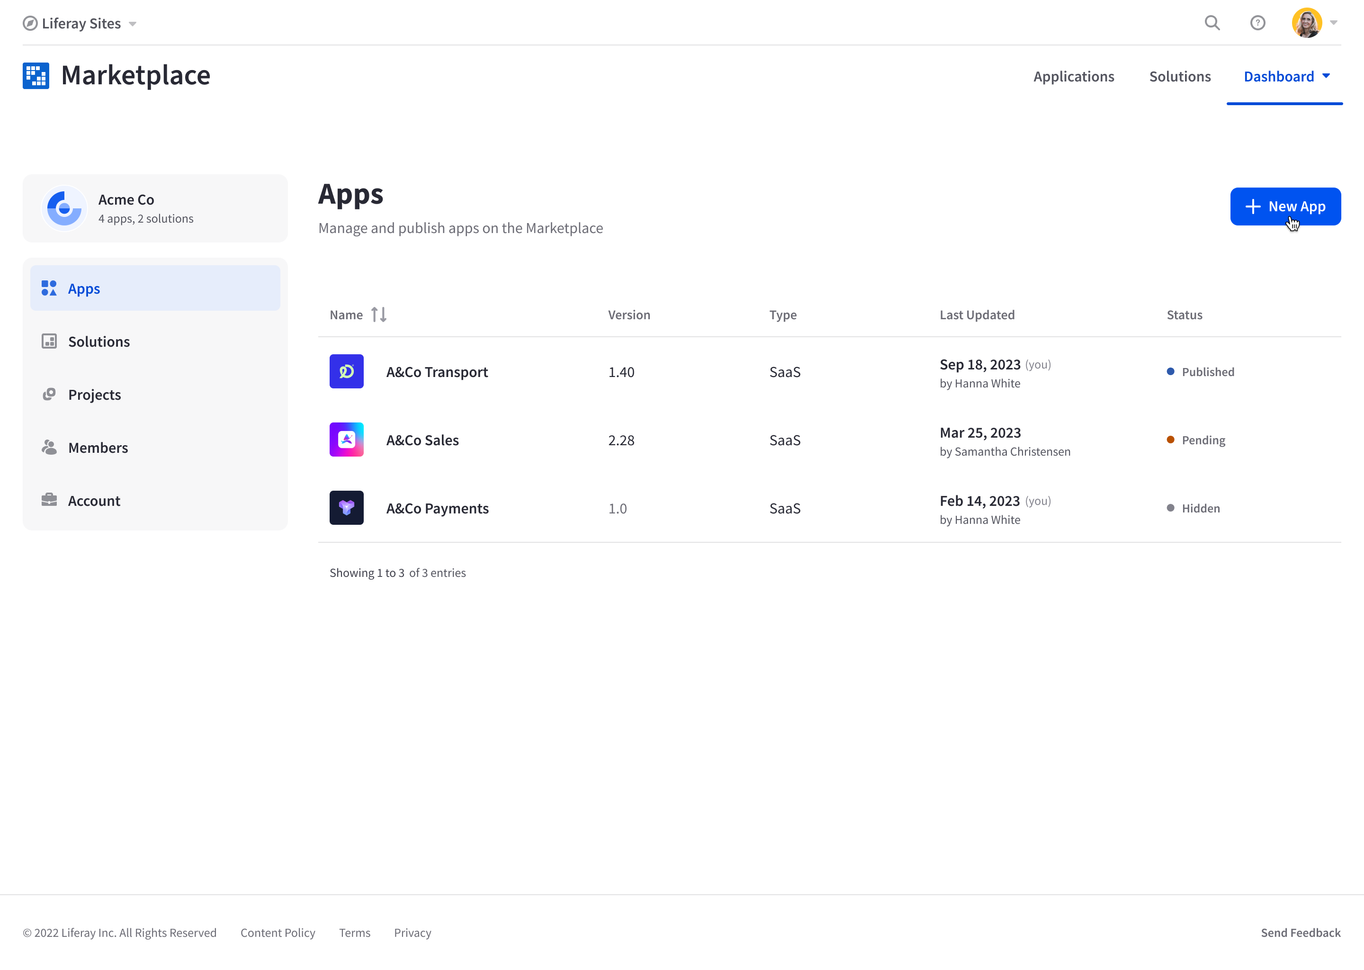
- New App
- Once logged in as a Publisher in the Marketplace, the user has to click on Publisher link present in the Dashboard menu (top of the right corner). Here the user can add a new app simply clicking on New App button to start the process.
- Publisher License Agreement
- Before moving forward, the user must download and check the Publisher License Agreement to agree the terms.
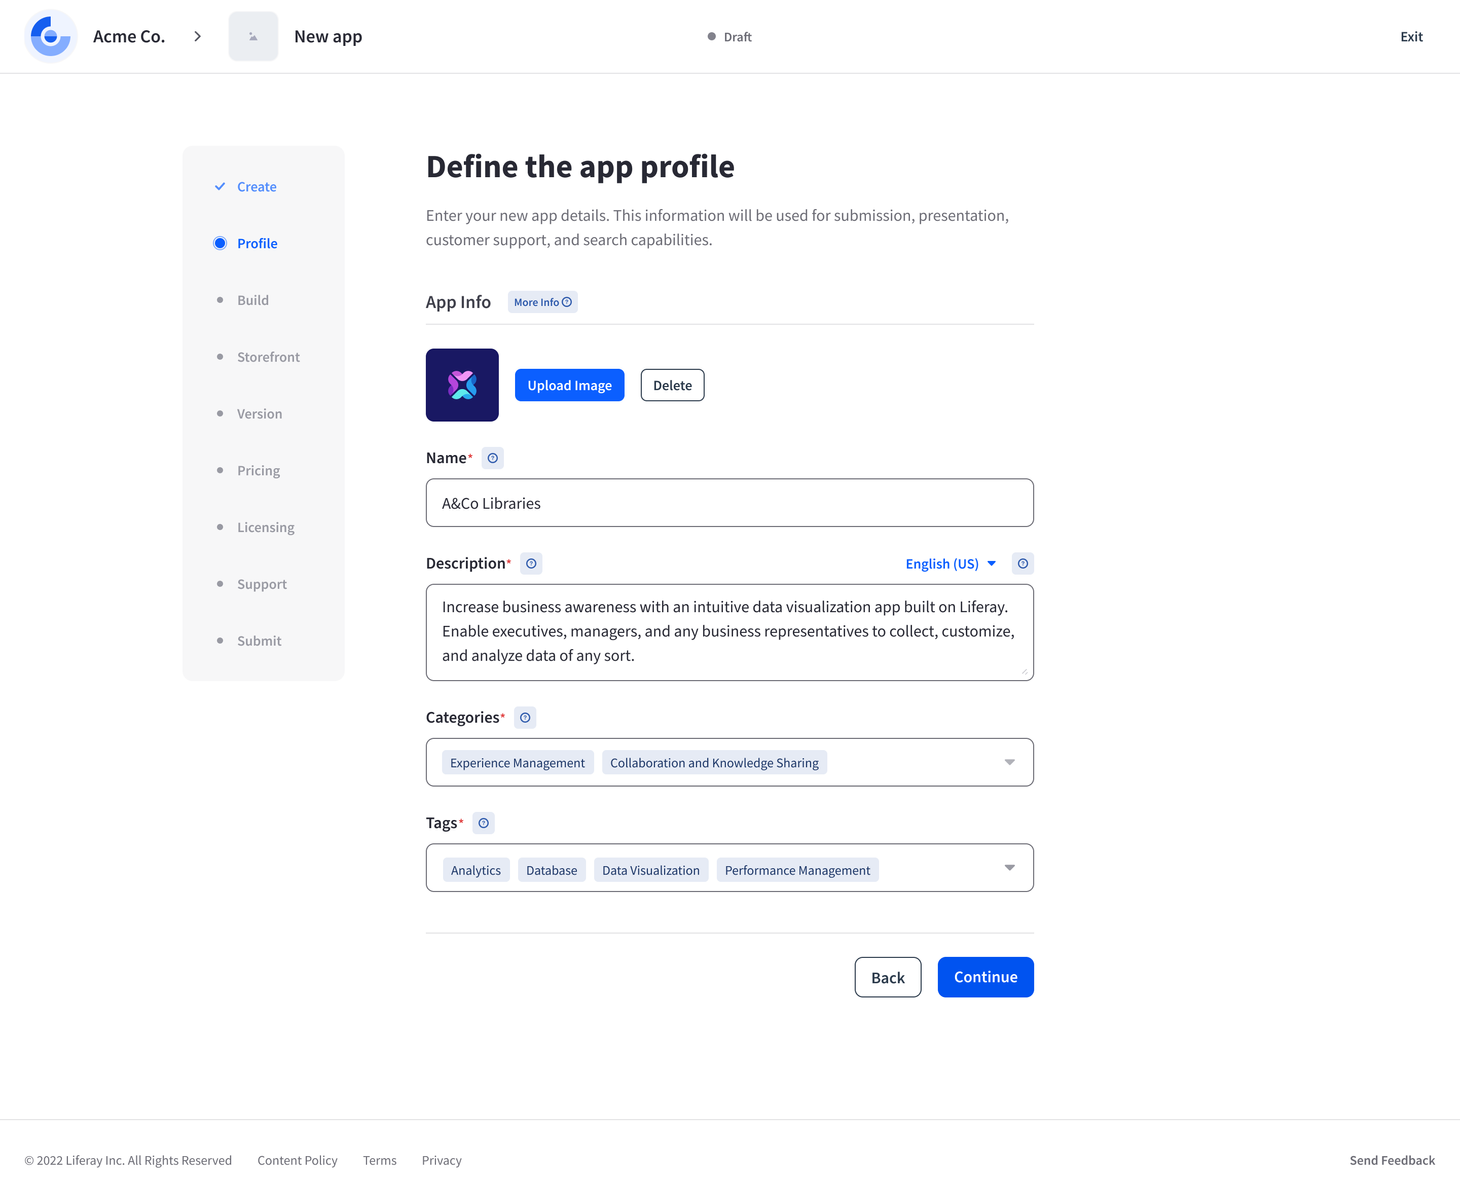
- Define the App Profile
- The user has to fill the form with the following details:
- Upload an imagine: the icon must be a small image representation of the app. Icons must be a PNG, JPG, or GIF format and cannot exceed 5MB. Animated images are prohibited. The use of the Liferay logo, including any permitted alternate versions of the Liferay logo, is permitted only with Liferay's express permission. Please refer to our trademark policy for details.
- Name (required)
- Description (required)
- Categories (required) by choosing one or more items present in the list
- Tags (required) by choosing one or more items present in the list
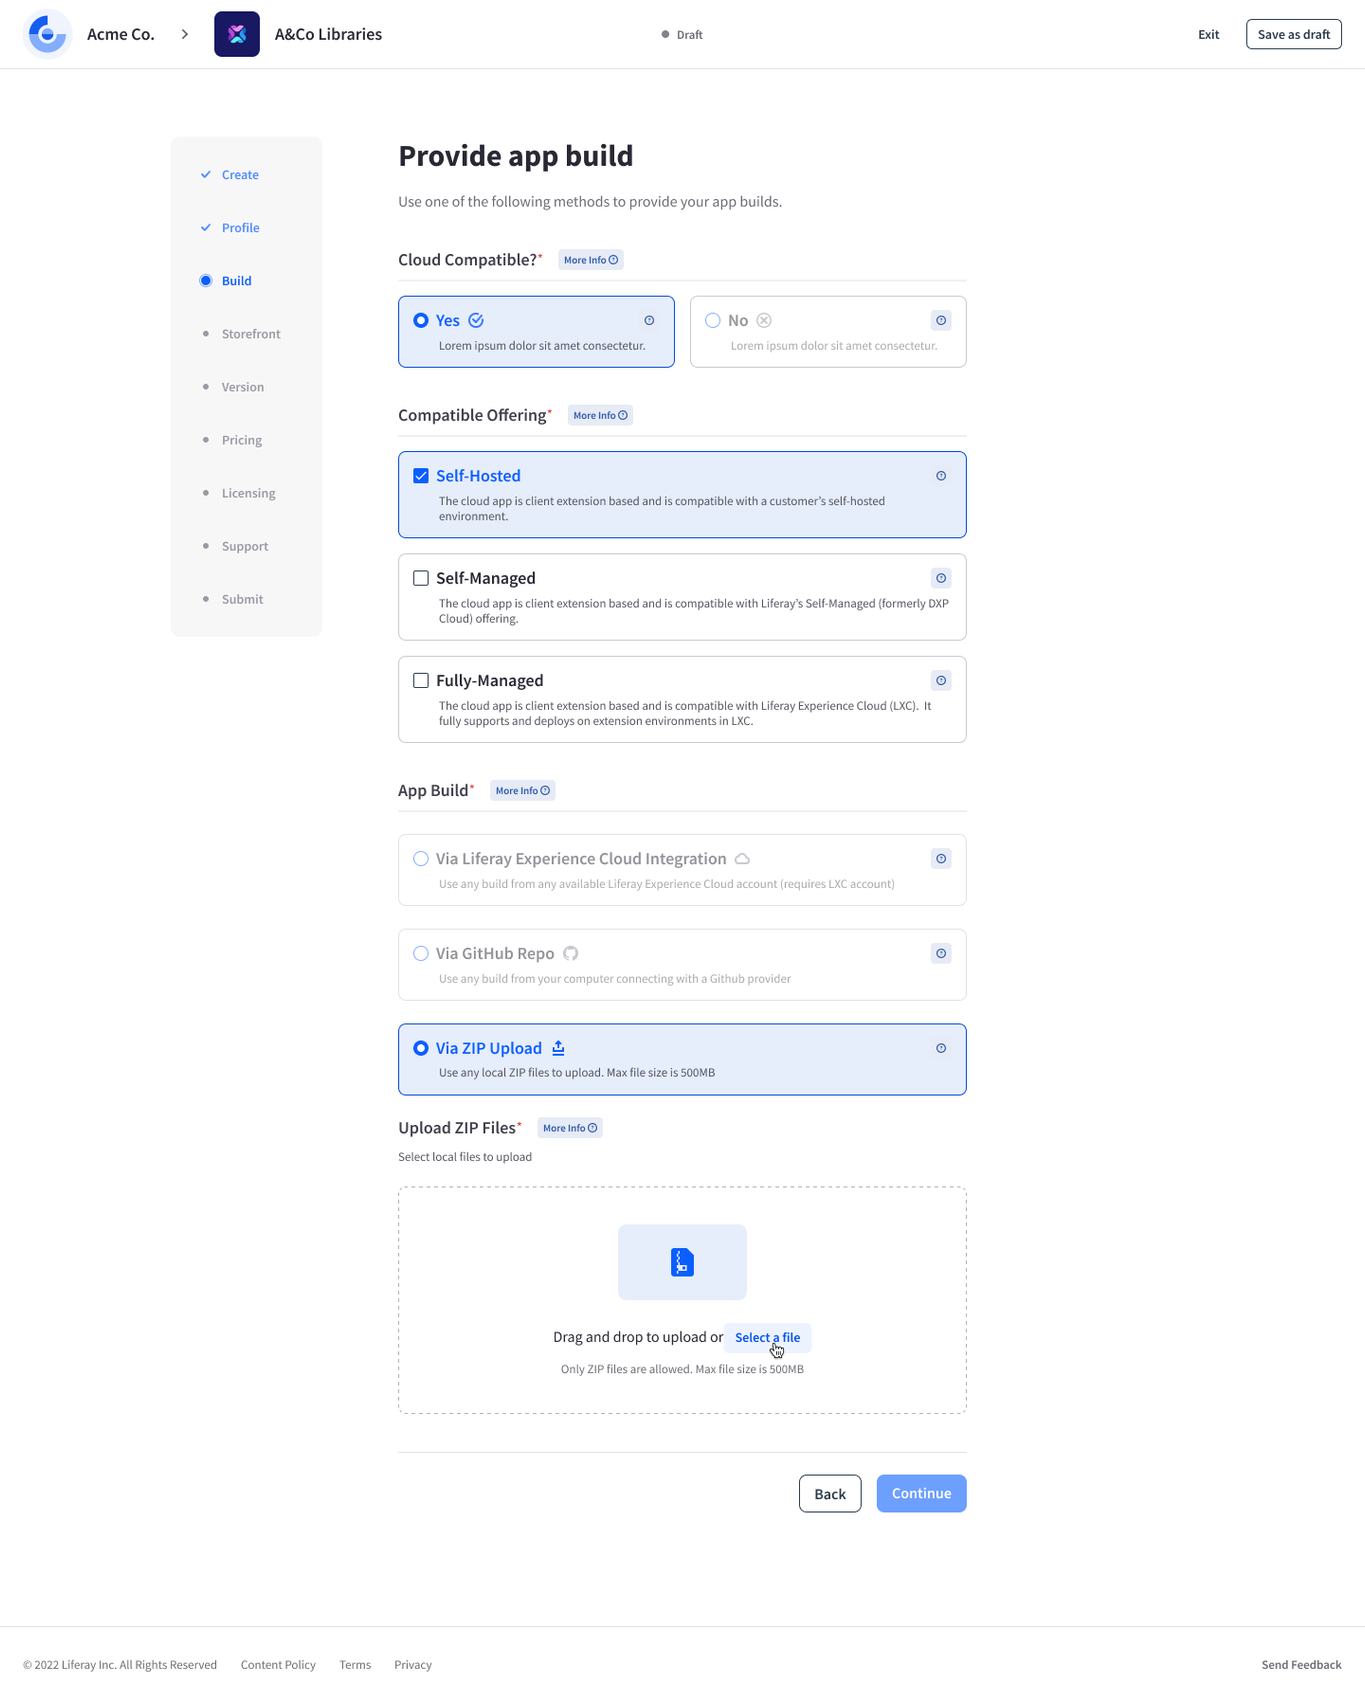
- Provide App Build
- For a Cloud compatible app, the user has to select the Compatible Offering then the App build can upload using a .zip files
- Customize app Storefront
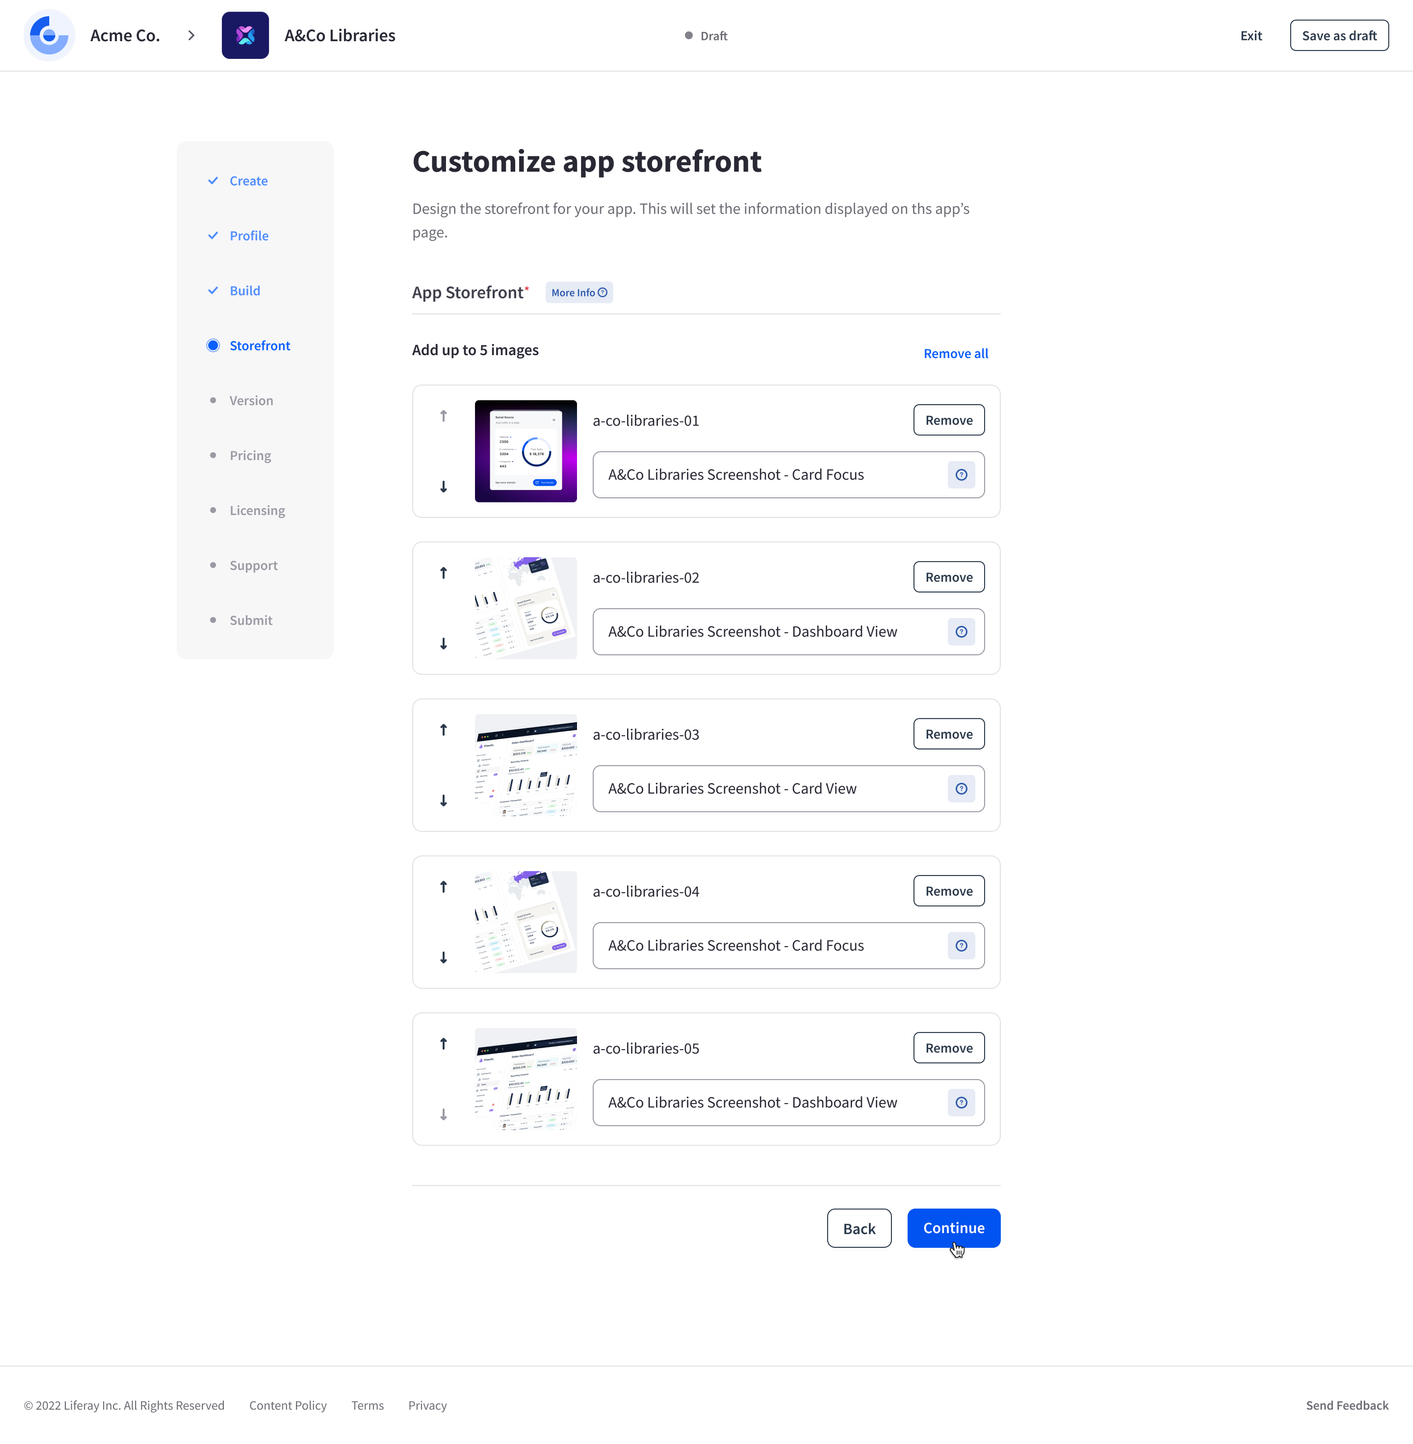
- The user can upload images associated with their app
- Up to 5 images can be uploaded
- Only file extensions of gif, jpeg, jpg, and png are allowed
- Max file size is 5.0MB
- Images can either be uploaded through a file selector or by dragging the file onto a hotspot
- Once the images are uploaded, there is another interface that allows for the following:
- Adding a Description to each image
- Replacing the image (Change)
- Deleting the image (Remove)
- Ordering the display (CP) Priority of the image (higher priority can be dragged to the top using handles on the left)
- Once all images are uploaded and configured, the user clicks the Continue button
- Provide Version Details
- the user provides the following info about the current app version:
- Version Number (required)
- Release Notes (required)
- Can contain both text and links to external release notes
- Max 1000 characters
- By default, the Description is stored in English
- However, there is a language drop-down above the text-area that allows the user to choose another language and fill in the data
- Once version details have been entered, the user clicks the Continue button

- Pricing
- The user must choose "Paid" and then click on Continue button
- Licensing
- Select Perpetual License and then click on the Continue button
- Choose the quantity and the license price and then click on the Continue button
- Support
- Fill the form with all the information needed. Once support URLs have been entered, click the Continue button
- Review and Submit
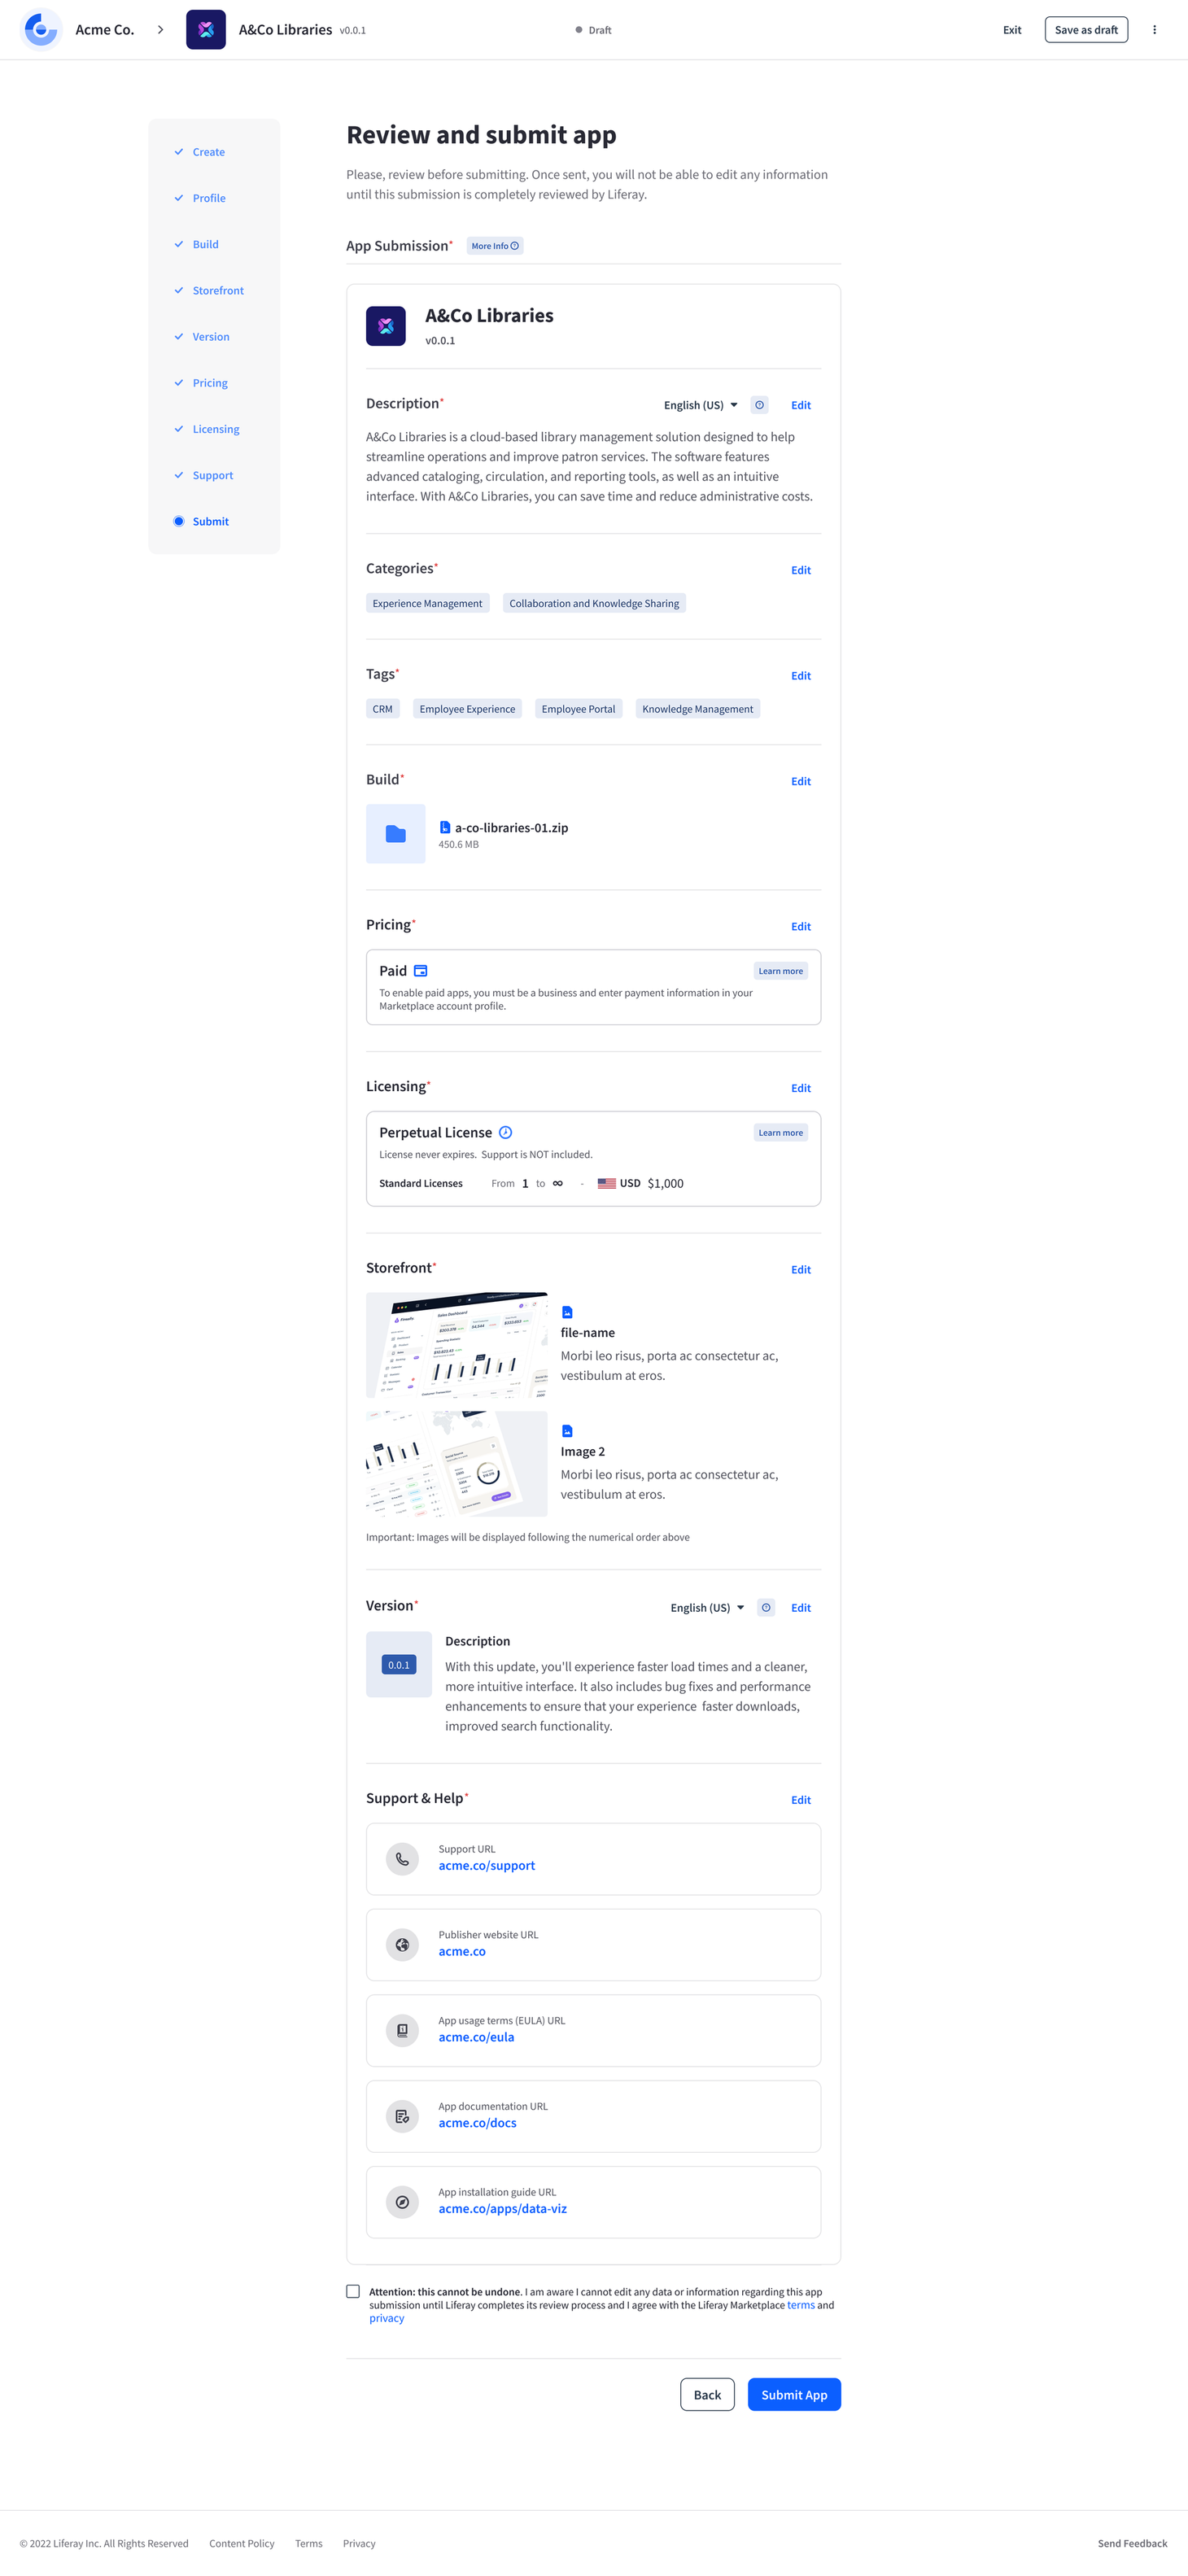
- In this page the user reviews all of the data that they have entered in the previous steps
- If the user wants to edit any of the data, they can click on the corresponding title in the left nav to jump to that section
- If everything looks good, check the checkbox at the bottom of the page and click the Submit App button
- Assuming the app is submitted successfully, the user is redirect to the Dashboard and sees a success message
How can the publisher edit a submitted App?
Once sent, the user cannot edit the App until the submission is completely reviewed by Liferay. After review, the user has to resubmit the app to make changes.
What happens once the app is submitted?
- After submission, the user receives an email confirmation of the app submission.
- After submission, a notification appears that the app was successfully submitted for approval.
- The app is shown in the Listings screen, along with the status of Pending.